Monday, February 21, 2011

Every home needs a hamburger press.

I know you can buy these things but I hate shopping and feel the need to justify my tool purchases.
I took a bit of hard maple and and routed a dish out on one piece and turned a plunger on the other. I glued the plunger into the top and trimmed the edges for a hinge. I rounded over the corners and applied some light mineral oil. I will "die cut" some plastic separaters to put in the bottom to get the meat out in one piece this week.
p.s. I burned the maple a bit cutting the finger pulls. It's beginning to be my trademark.

From wood stuff 2010

Saturday, February 5, 2011

Bandsaw V Jig for cutting round materials Safely.

From bandsaw V jig
One of the routine tasks I use my bandsaw for is cutting tubes and wooden dowels to length.
Quite often if you don't have a jig or cradle of some kind to hold your stock the cut is crooked and in some cases the stock jumps on the blade and can either break it or give you quite a scare or both.
Today I made a small jig from a piece of 2 x 6 stock and a scrap of three ply fir plywood.
I can't give you any dimensions for this as each Bandsaw as a different table set up but the procedure is quite straight forward. First take a short piece of 2 x 6 for rough lumber and plan it flat on both sides so it can sit on the plywood without wobbling. You can use a hand plane but in this case I ran it through my jointer. You have to joint one side of this board as the next procedure uses the table saw fence as a guide and outside will rest against it.
Set the blade on the table saw the 45° and section the 2 x 6 board into two equal pieces.
Next, trim the leading edge or sharper edge of the angles so formed off the 2 by 6's and leaving a blunt edge of approximately 1/2 inch to glue the centers together. Grab a couple of 12" clamps and glue these edges to each other. Next trim the plywood on each side to make sure it will ride square to your table.
That is suitable piece of hardwood runner to fit in the slot of your bandsaw table and a line the plywood to the table and screw it to the runner.
Take the V-shaped 2 x 6 bed you just glued together and screw it to the leading edge(closest to the blade) on the plywood.
Crew through the base and V-shaped bed on the bandsaw then remove it and place a screw and each side of the saw cut to stabilize the be bed.
I left the V notcvh long to help with longer stock.
You're done now but should you need a strap or two to prevent your stock from rolling youve got plenty of room on each side of the bed to attach same.

Here's a picture of the finished bed.
From bandsaw V jig
And here's a couple pictures of stock cut using this jig.

From bandsaw V jig

From bandsaw V jig

Tuesday, January 18, 2011

Maximising space in the small shop

I'm still trying to organise my clamps and keep them within reach but out of the workspace.
I find it is harder than it looks.
I have about thirty or fourty small clamps that I use for various projects. Until now I kept them in a box and it was not working for me that well expecially for glue ups.

I whacked this together this morning:

From
If I leave the four corner clamps until last I can remove any or all of the other clamps from the holder withone hand.... of course if I put 4 dowels on the corners I could remove them all. ...Maybe tomorrow;-)
Here's a crib for some of my most used screwdrivers and chisels.
The boxes are on piano hinge and mounted under my cupboards. I fastenened them up with bent wire hooks to leave the shelf over my dust collector pipe free to handle some hammers.

From small parts hangers
Here they are open.

From small tool storage

Here's one for my spring clamps.
From small tool storage

A simple outfeed table that takes little space

There's not much to add to this little slide presentation.
I hope some of you find it useful.

*Just click on each picture in the row and it enlarges and give you a bit of text to follow along with.*
http://members.shaw.ca/boboswin/public/Outfeedtable/

This is only an example please click on the grey text here.

From Drop Box

Production jig for multi business card holders

I sometimes get requests for things I have made one of and find that making a second one is as time consuming as the first and prone to the same errors.
To avoid this I try to make jigs that take the guessing out and speed up the process when the need arises.

I will be using this business card holder as a prize in several silent auctions this year so I wanted to keep the fabrication time down to a minimun.

The first shot shows several prototypes where I worked out the shape and size I wanted to use.
This is absolutely an essential step .

From business card holder

This next picture shows the jig made from MDF .It is essentially a right angle to butt the blank on with two adjustable cleats to hold the blank firmly in the corner.

From business card holder
On top of that is a guide to center the forstner bit exactly for cutting each corner.
I used 3/4" MDF and 11/16" spruce for the right angle to allow the blanks to side in and out without binding.

From business card holder

Next picture show how the guide centers the forstner bit so it drops on the same spot each time.

From business card holder

Here I am showing the finished blank still resting in the jig, We now have 4 nearly identicle corner radiuses.
This took about 2 minutes to prep thanks to the jig.

From business card holder

Next picture shows the set up for the mini router bit profile.

From business card holder

With a prototype blank mounted in the jig I ran a test to make sure we have the profile set correctly on the edges.


From business card holder

This shot shows a couple of blanks ready for finishing.
I tried 2 different profiles on them to see what works for me.


From business card holder

Here are some early results from the jigging.
I have yet to make a small jig for dirilling the screw holes that mount the stantions. - Later

From business card holder


From business card holder
Special thanks to "Dusty56 ":http://lumberjocks.com/projects/16691 who inspired me and helped me get up and running on this project

Mortises on the router

As usual, I'm looking for an easier way to do a task when I'm woodworking.
Every so often I find myself needing to do more to some mortise and tenon joinery and have often thought that I wanted a dedicated mortiser.
My first big problem is I simply don't have room for another machine in my shop the second problem is I’m basically lazy and I just hate ten minute set ups for 5 minute jobs.
I was reading Bill Hiltons great book on using the router and I noticed that he had shown the router set up with two fences.
Eureka!
I have two fences!

I skipped out to the shop and grabbed a couple of pieces from the scrap pile and milled and faced them as shown here:

From router fence mortise

I clamped the big board in my vice and marked off a couple of spots for my mortise.


From router fence mortise

I grabbed the router I had that had two identical fences available and slipped one on either side of the guide rods.

From router fence mortise


Next, I dropped the router on the board clamped in my vice and lined it up with the previously drawn centerline. Because the fences are adjustable you can position your mortise and tenon anywhere along the edge of the material With really narrow material just use acouple of spacers on each side of the piece to be morticed.

From router fence mortise

From router fence mortise

From router fence mortise

I tried a couple of passes on the test base to get the feel for this rig and then proceeded to cut the tenon over on my table saw. After having a rather dismal result truing the shoulders of the tennon using my Osborne miter gauge I discovered that there was some play in the miter stop and that was preventing me from getting an accurate shoulder all the way around the tendon. A small turn with a spanner wrench and we were good to go.
I should mention that I did use a dedicated tenon device on the table saw to exactly position the tenon for proper fit in the mortise.

From router fence mortise

From router fence mortise

Here is the final result and I am pleased with the fit and the overall time it required to make this joint.
I am estimating that including scouring out the mortise with a chisel and cutting the tenon that my working time start to finish should be in the 4 to 5 minute range. What I like best about this system is it required no additional purchases apart from an extra fence guide and requires no specific footprint in my small shop.

Wednesday, January 12, 2011

A larger centering jig for wider stock

After I made the small "centering gage last week":http://lumberjocks.com/projects/3023 I decided yesterday that I could use a larger one as well for drawers and the odd cut on plywood .
I picked up a package of 1/4" brass threaded inserts from Lee valley tools last week as well as a knurled set screw to hold the pencil in place.!http://www.leevalley.com/images/item/hardware/jigfixtureparts/44z0201s1.jpg!
I had a piece of mahogany lying about that had the height and width i needed so I cleaned it up with my fore plane and proceeded to mark the stick out to recieve the inserts and hole for the pencil
centering-gage1

The centering of the inserts was easy using the drill press and a fence to line things up on the center mark from my smaller gage.
To make sure the hole were equidistant from the center I used stop on the fence and drilled the first hole them flipped the stick round and dropped in it's mate.
the layout took about 15 minutes because I wanted to check everyting but the actual drilliing was only about 5 minutes.

centering-guage-2

Here's another shot showing how I made the centering pins from some 2-1/2" bolts with the heads sawed off.
I was going to use brass rod for the pins but the Borg needs $18.50 for three feet of 1/4".

What they don't know will kill them.

centering-guage-4-
I layed out the top curve with a french curve and ran it through the bandsaw.

It took about an hour and half of piddling and about 20 mins actual work to make this.


Question... Am i anal enough to put a finish on it?

p.s. The complete project is in shopnotes VOl 15 issue 86 page 24...

Cheers Bob

Simple divider for centering cuts on edges of common boards

Finding center can be frustrating when you are in the shop and need a quick way to place a biscuit or dowel or mortise.
This simple math trick does the job for you.

Drill two holes in a piece of 3/8" thick stock that are 2" a part and exactly the size of your selected dowel material
The center hole should be the diameter of your favorite pencil stock.
All the holes must line up along a straight pencil line for this to work.
Drill a hole dead center between the previous dowels for the pencil.
If it's a bit loose set a screw through the side of your wood to hold it .

That's it!

By placing a dowel on each side of your wood and running down the stock with the dowels touching the sides you will draw a line dead center on the work.
You may want to stack more layers up to hold the pencil so the sharp end doesn't protrude as much.

Enjoy Bob
brd-divider

Friday, January 7, 2011

small mortise hinge jig for boxes etc.

I've been struggling with fitting brass hinges into softer woods that I seem to work with today against my better judgment.
By the time I have the mortise cut for the hinge I find that usually a portion of the mortise has either fallen away, been crushed by my chisels, or a combination of both leaving an unsightly gash into which I have to place my hinge.
I've been looking at this jig as outlined in ShopNotes volume #12 No. 74.
From hinge jig
From hinge jig

From hinge jig
From hinge jig

The principle of this jig relies upon your router having a square base with exact sides. In my case I am waiting for a new router and used my roto zip that happens to have a 4 inch base attached from a previous job.

From hinge jig

The first thing you need to do is determine where you need your hinge to sit in the wood. I laid a couple of hinges up as shown and marked their positions with a sharp pencil.
From hinge jig
Next I opened the gate on the jig and fitted each hinge to the exact opening. Next the depth of the hinge was set using a side gauge on the jig.
From hinge jig

Once the frame is lined up with the dimensions of the hinge the depth of cut is set for the router bit to match the thickness of the brass hinge being used. I actually made the mortise inset slightly deeper than the hinge so I could lightly sand away the milled edges giving me a cleaner mortise .
The last picture pretty much speaks for itself.
As shown, a 2 1/4 inch mortise on the left and the three-quarter inch mortise on the right and both are more than acceptable by my standards.

From hinge jig
You canwatch a demo of this jig here:
http://www.shopnotes.com/issues/74/videos/using-the-hinge-mortising-jig/

A landing apron for your miter jig.

I have had this Leigh dovetail jig for more than a year and have yet to tune it so I can use it.
From wood stuff 2010
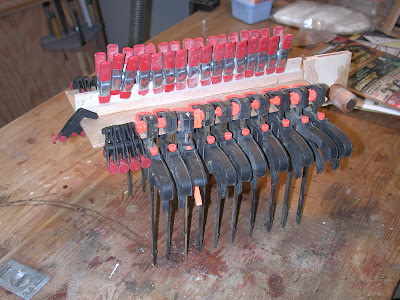
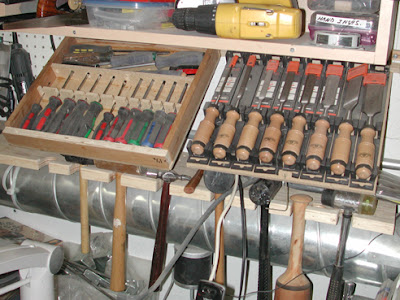
When I first got it it was an old D4R so I upgraded the clamp mechanism and added a bit of adhesive sandpaper to the clamp bars.
The first couple times that I tried this machine I found that the wood wanted to slide under the clamp bars so I put sandpaper strips to control that .
I also had difficulty the 1/4 inch shank bits that I had on hand were sliding out of the collet adapter and spoiling the joints.
I replaced the collet with a new one from Lee Valley and purchased *8mm shank* bits as well as an *8mm adapter*.
I'm surprised how much better this combination seems to work in my router.
It makes me wonder why the industry ever produced quarter inch bits as they have been a pain in the ass since I started woodworking.
My "go to" router has become a Triton three and a quarter horsepower machine which has all the right features but of course, with a large motor, becomes a bit of a behemoth to move back and forth on the job.
From wood stuff 2010
"So I decided to treat myself and purchased sliding vacuum system and extension table from Lee industries.":http://www.leighjigs.com/vrs.php
From wood stuff 2010
Essentially, it's a long smooth sheet of aluminum fixed in place by 4 rare earth magnets. On the underside they have attached a vacuum that slides along as you route. The end result is no more sawdust in my socks a convenient table to rest my router on and keep it level during the machining process. the two wire arms adjust to fit any router and the entire mechanism slides like silk with the addition of a bit of wax to the surfaces.

While setting the jig up to do a few test pieces I noticed that the fingers had several small imperfections from the casting process that made my router stall and catch in places in places making movements back-and-forth a bit jerky. I put a fresh piece of 180 grit sandpaper in my palm sander and gave all the mating surfaces a light buff. Just enough to remove imperfections.
I then gave the entire mating surfaces a light coat of Johnson paste wax to the base of my router.
The router slides on the table with one hand now!
From future projects 2010
Next I cut some pieces pine 1 x 4 and ran a couple of test joints shown here.
From wood stuff 2010
These joints are not perfect but they do show me that I'm on the right track.
The attached vacuum makes it extremely simple to rest the router between passes. I used to have to lift it over top of the jig and set it down between each pass.
From wood stuff 2010
Rather than try to hook up the Vacuum line to my central dust collection system from a 1 inch intake line I chose to use a small shop shopvac located on my storage shelf and operate the on/off switch with this auto switch so that each time I turn the router on the vacuum automatically goes on and runs for an a additional 10 seconds after I switch it off
From wood stuff 2010
.